Publishing a Sticker Pack App for iMessage
From iOS 10, Apple has come up to meet the non-programmers to create a tool that helps to release sticker packs for iMessage. Thanks to this, each of you who has an idea, an Apple Developer account, Xcode, and some patience can release your own sticker packet for Apple devices.
The process of making an iMessage sticker pack is simple:
- make a bunch of images that you want to become stickers
- put the images into an iMessage extension in Xcode
- submit to the App Store.
Step 1: Make a bunch of images that you want to become stickers
Before you start working on your own stickers, you need to be aware of a few details in mind:
Formats acceptable for stickers: .png, .apng, .jpeg, .gif
Sizes acceptable for stickers: small (300px by 300px), medium (408px by 408px) and large (618px by 618px)
Naming is important: the names of the stickers cannot have any special characters or underscores. (i.e. instead of super_sweet_lion.png supersweetlion.png)
Transparent backgrounds: make sure your images have a transparent background when exporting, unless you want the image to take up the full artboard.
App icon: your application needs an icon. Below I’ve put all the required icons that need to be prepared for the project
Step 2: Put the images into an iMessage extension in Xcode
To illustrate these steps, I made an example sticker pack. In Xcode 8.o+, open up a new project and select “Sticker Pack Application.”
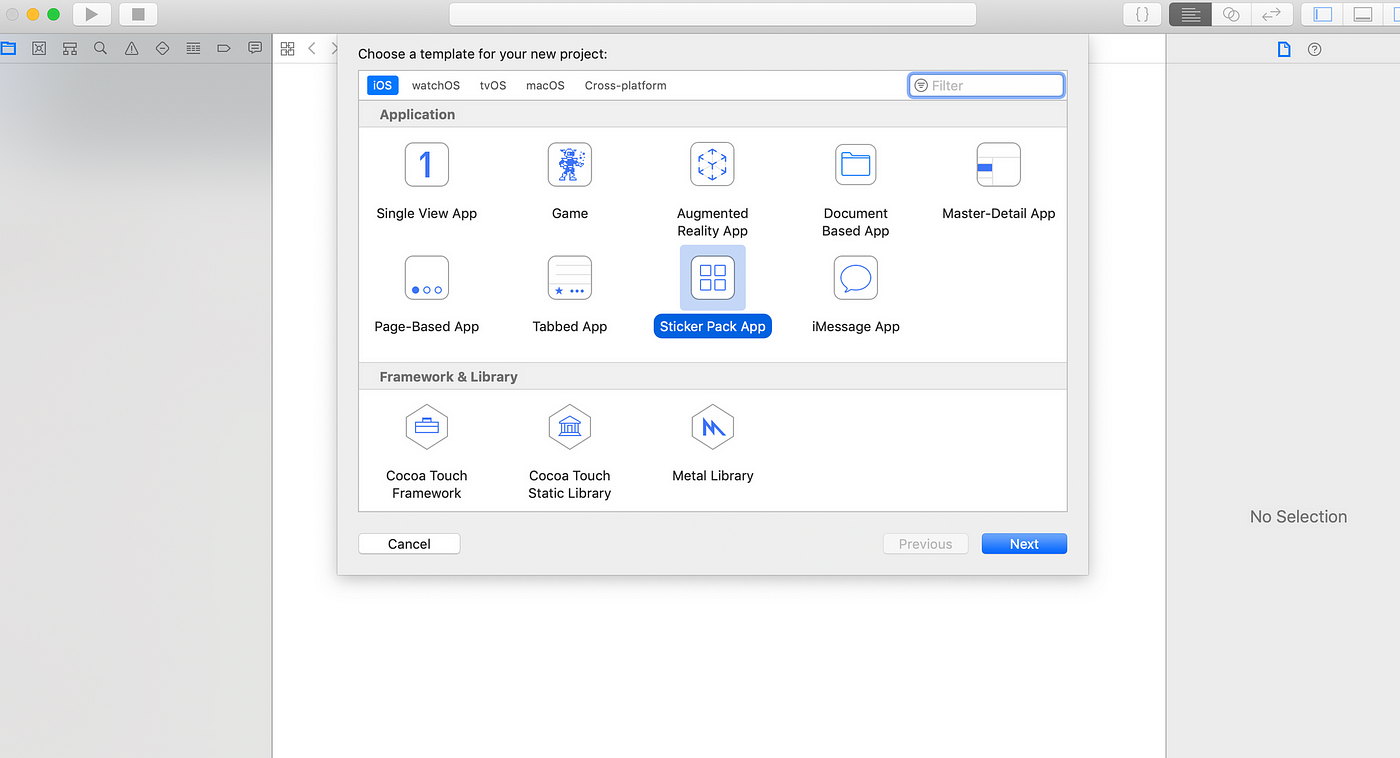
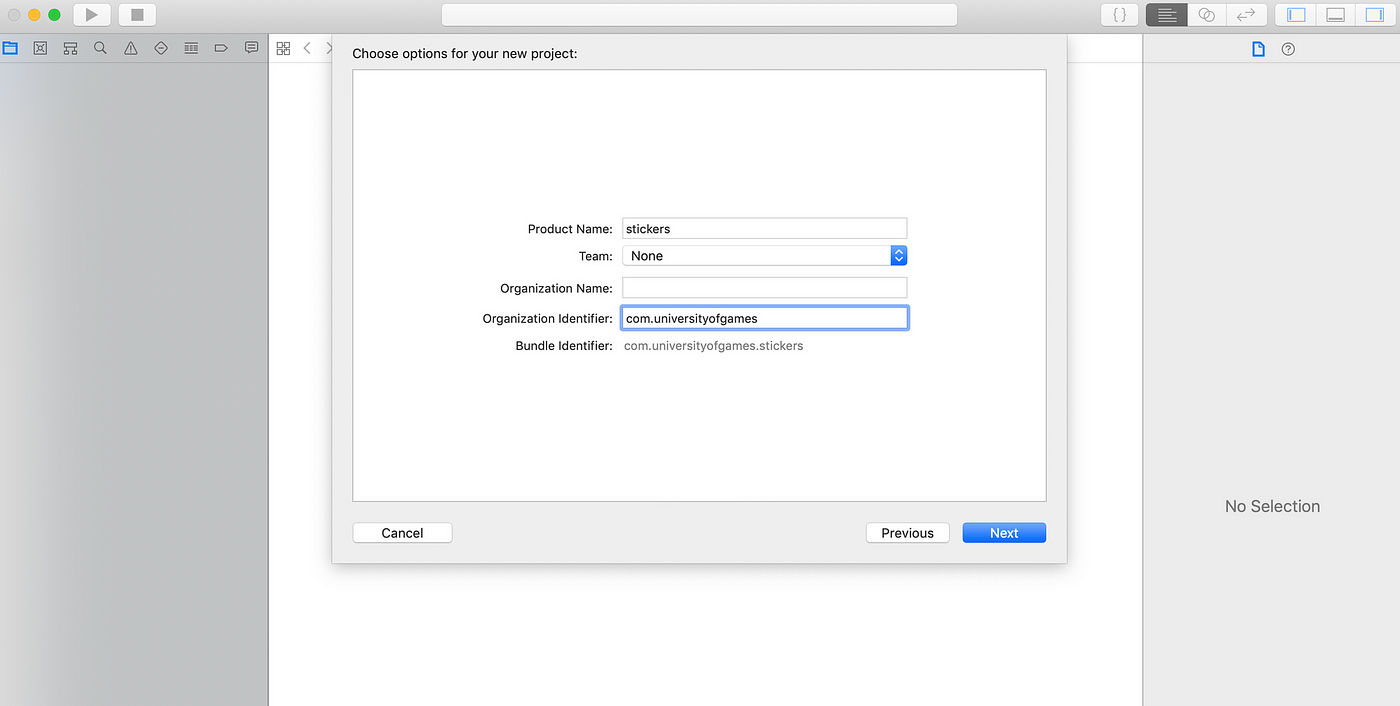
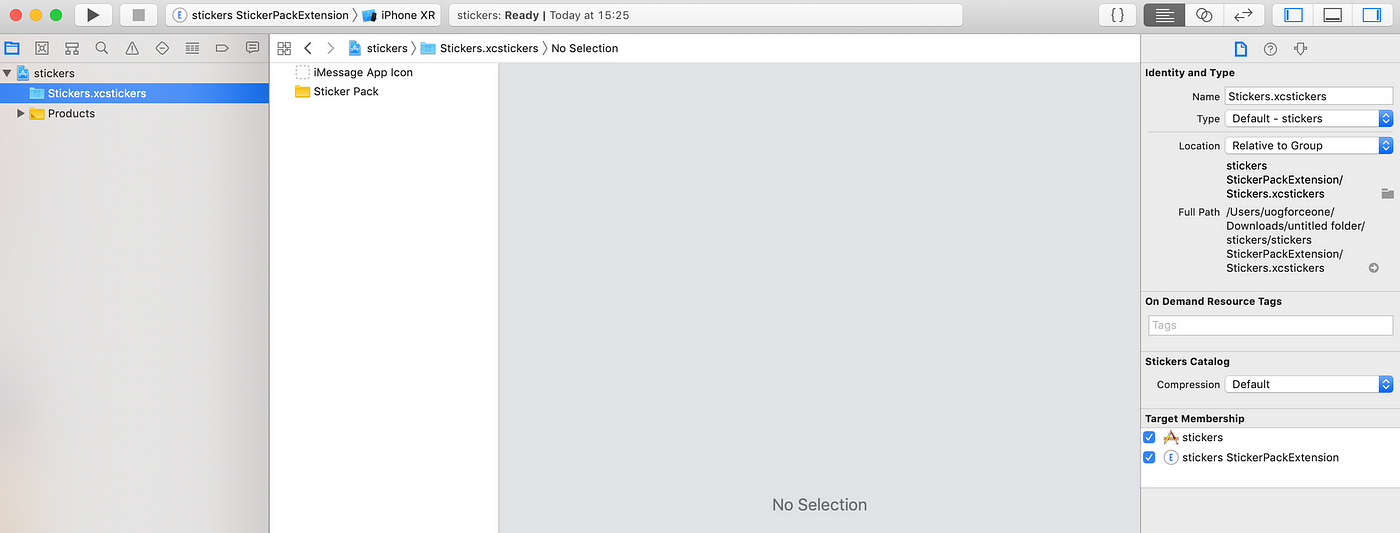
After you’ve given your project a name, click on the blue Stickers.xcstickers folder in the navigation area and drag in your sticker images into the editor area.
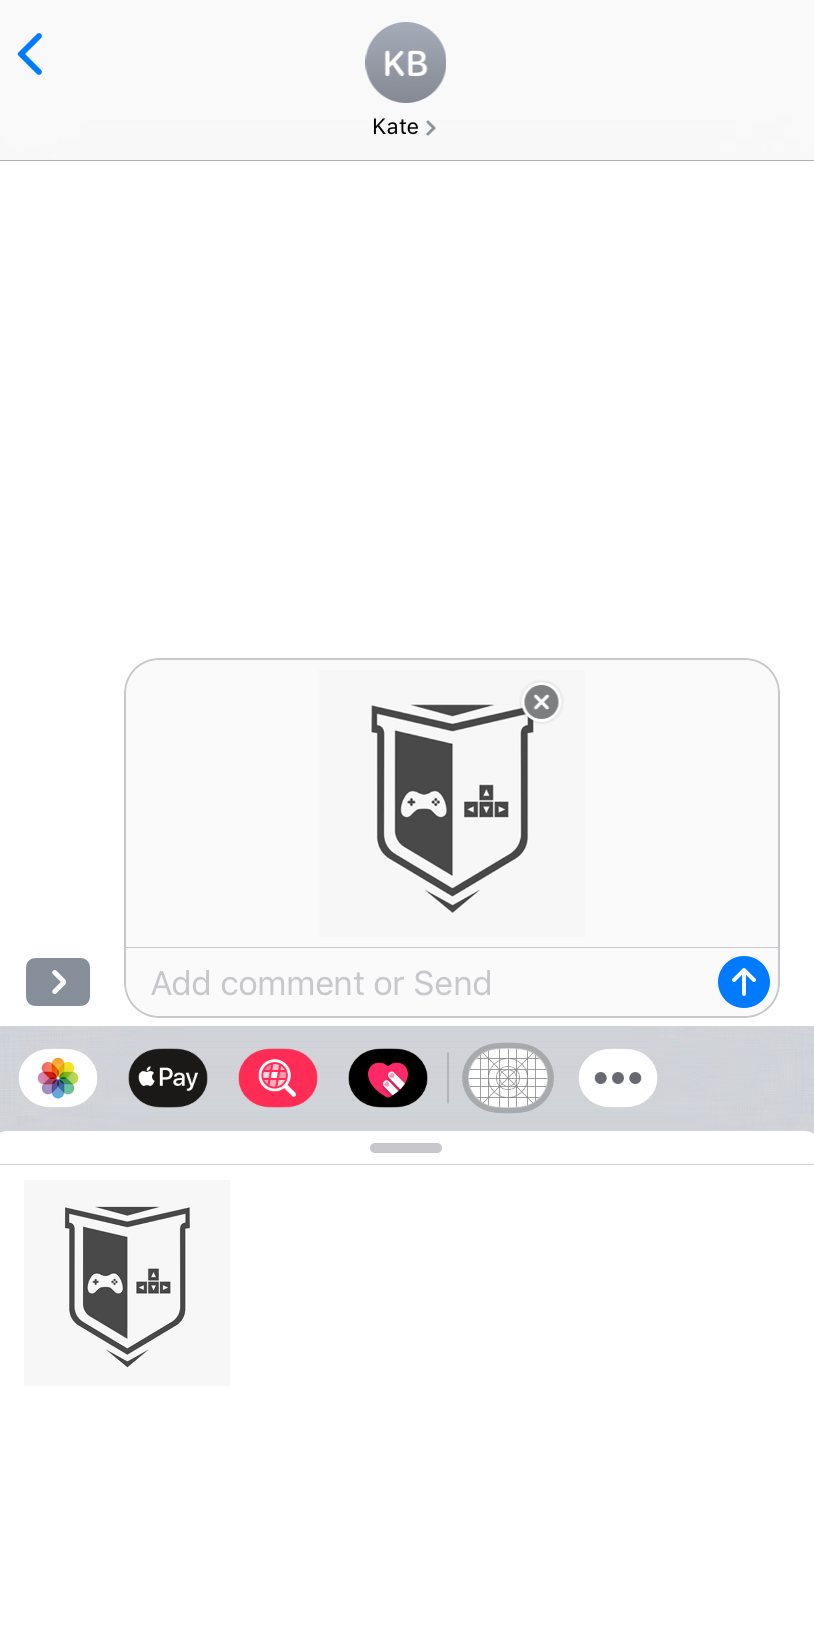
Now, run your app. The simulator should open to iMessage. Click on the text field and choose the iMessage app button. You can even play around by clicking on your sticker images and putting them in a fake iMessage with Kate Bell.
Step 3: Get them ready to submit to the App Store.
You’ve created a charming set of stickers! Congrats! Next part is publishing your stickers to the App Store for the anyone to use. It requires becoming a member of the Apple Developer program, which costs $99 a year. If you’re not interested in buying the membership, you can still upload your stickers on Xcode and test them out on a simulator, but you won’t be able to publish them. Here is a few steps you need to make:
- Become a member of the Apple Developer Program. — Go to developer.apple.com and click “account” to create an Apple Developer account. This will cost an annual fee of $99 per year.
- Register an App ID in you Developer account. — Go to developer.apple.com and click Certificates, Identifiers, & Profiles, and then App IDs under Identifiers in the left navigator. The App ID is specific to your sticker pack, any new sticker pack you create will have its own App ID.
- Archive your sticker Xcode project — the archive function can be found under Product > Archive
- Submit your app to iTunes Connect
Log back into your Apple Developer account and click iTunes Connect. Once in iTunes Connect, go to My Apps, and click the + to create your app. The archived build you created earlier should show up in the build section in iTunes Connect. The last step is fill few things:
- App description
- A website to use for support
- Up to 5 screenshots for iphone and ipad (iPhone — 1242 x 2208px (5.5 iPhone display) iPad — 2048 x 2732 px)
- The app store icon created earlier (1024 x 1024)
- price of your stick app
Once the build is added, and all of the information is filled out, you’re ready to submit your app! Remember that Apple will send you emails on the status of your app, but it will also show you the status in “My Apps” in iTunes Connect.
Take a look for our cute Sticker pack: https://itunes.apple.com/us/app/jungle-animals-stickers/id1442736539#?platform=ipad
Step 4: Market
One of the best parts of the process is seeing your app fall into the hands of people who will enjoy it, benefit from it, and make it a part of their lives. That’s the beauty of marketing, and there are many ways to go about it. Here are a few points to take under consideration.
- Friends and family word-of-mouth. If you’re not aiming to maximize downloads via ASO, you can still spread the news to your friends and family, and use channels like social media to share your designs with your inner circle.
- App Store Optimization (ASO). If your goal is to maximize downloads, ASO is a worthwhile investment. The app title and keywords are the main factors that can affect ASO. Find relevant keywords most often used by your target audience, and use methods like A/B testing to find optimal combinations.
- Target Audience Channels. By identifying your target audience and the channels they frequent, spreading the word throughout those channels gives your app a great shot at being discovered by those who will love it (and most likely tell their friends who’ll love it too).
- Feature on the App Store. See those app bundles on the home page of the App Store? Those features are all curated by the App Store editors, and your app can be featured on there, too. Visit this page to tell your app’s story and get a chance to be featured. Be sure to submit this form 6–8 weeks in advance.
As you continue on your journey as a creator, I truly hope that this guide serves as a helping hand.

To help us create more free stuff, consider leaving a donation through Patreon where you can vote for the next asset pack and get access to future packs & articles earlier. Sharing knowledge is our passion. Unfortunately, keeping a team of professionals costs a lot that’s why we are constantly taking on new opportunities.
We’ll be publishing any news on the following outlets:
Thanks for reading!
Leszek W. Król
On a daily basis, I accompany companies and institutions in designing strategies and developing new products and services.

 Photo by